Deutsch
SELEKTIONSPROZESS | HSG CAREER DAYS 2024
Auf www.hsgcareer.ch haben Sie die Möglichkeit, Studierende für Ihre Veranstaltungen anzunehmen oder abzulehnen sowie deren Lebensläufe herunterzuladen.
Mit dieser Anleitung können Sie ganz einfach die Studenten für Ihren Workshop / Ihr Interview / Ihre Präsentation oder Abendveranstaltung auswählen.
Am wichtigsten: Sie wählen Ihre Studenten selbst aus! Nach Ablauf der Bewerbungsfrist für die Studenten können Sie ein Lebenslaufbuch aller Bewerber für jede Ihrer Veranstaltungen herunterladen. Sie müssen alle Bewerbungen durchgehen und die Studenten für alle Ihre Veranstaltungen einladen oder ablehnen. Die Studenten erhalten automatisch eine Benachrichtigung über den Status ihrer Bewerbung, sobald Sie Ihre Entscheidung getroffen haben. Für Interviews informieren Sie bitte den Studenten, zu welcher Zeit und in welchem Raum Sie ihn/sie treffen. Senden Sie ausserdem einen Reminder an die ausgewählten Studenten einen Tag vor der Veranstaltung. Sie können ganz einfach eine Nachricht aus unserem System senden. Dies minimiert effektiv Nichterscheinen. Wir empfehlen auch, mindestens 3 Studenten auf Ihre Warteliste zu setzen. Die Frist für die Studentenbewerbungen endet 7 Tage vor der Veranstaltung. Bitte geben Sie den Studenten spätestens eine Woche vor Ihrer Veranstaltung ein abschließendes Feedback.
Übersicht:
1. Anmeldung auf my.hsgcareer.ch
2. Wie gelangen Sie zur Auswahloseite
3. Wie Sie die Lebensläufe durchsehen
4. Wie Sie Studenten für Ihre Veranstaltung akzeptieren & ablehnen
5. Wie Sie Nachrichten an Studenten senden
6. Wie Sie Lebensläufe herunterladen
Overview:
How to log in on my.hsgcareer.ch
How to get to the selection page
How to accept & decline students for your event
How to send messages to students
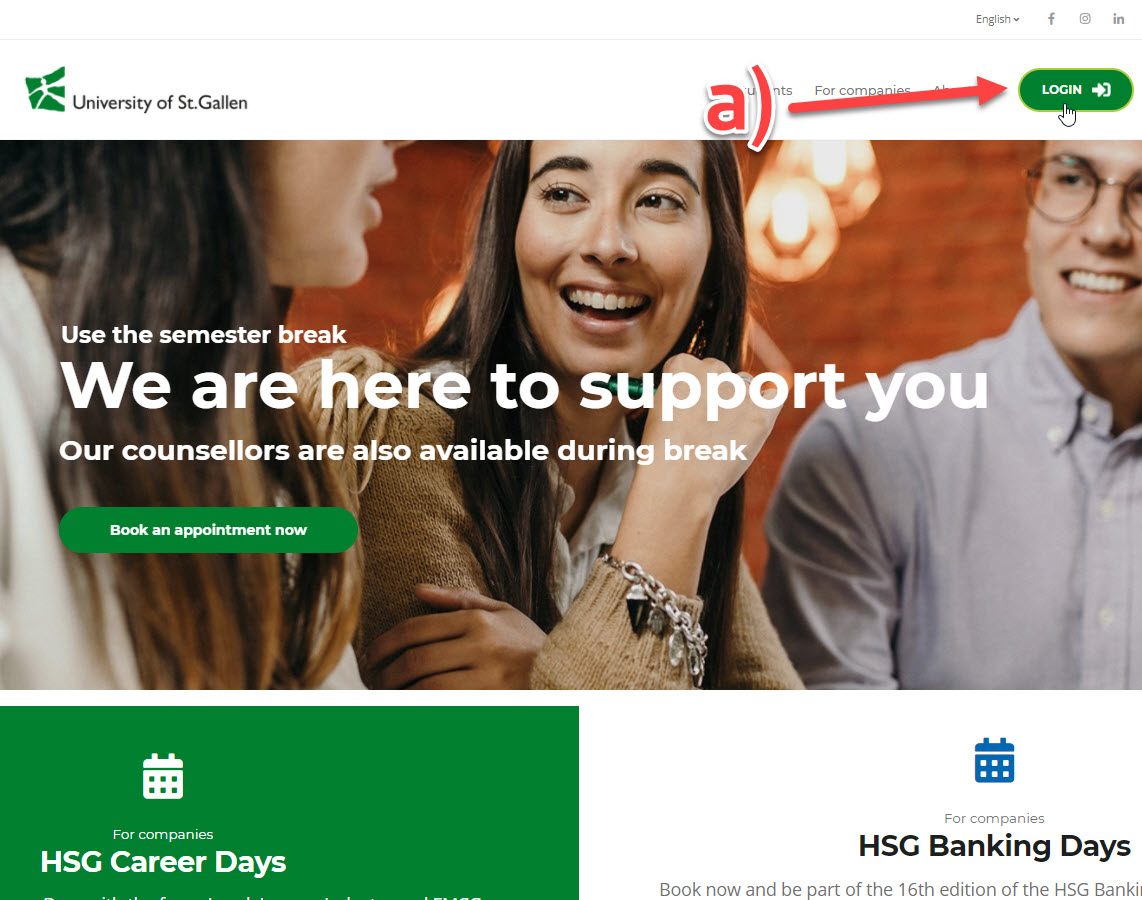
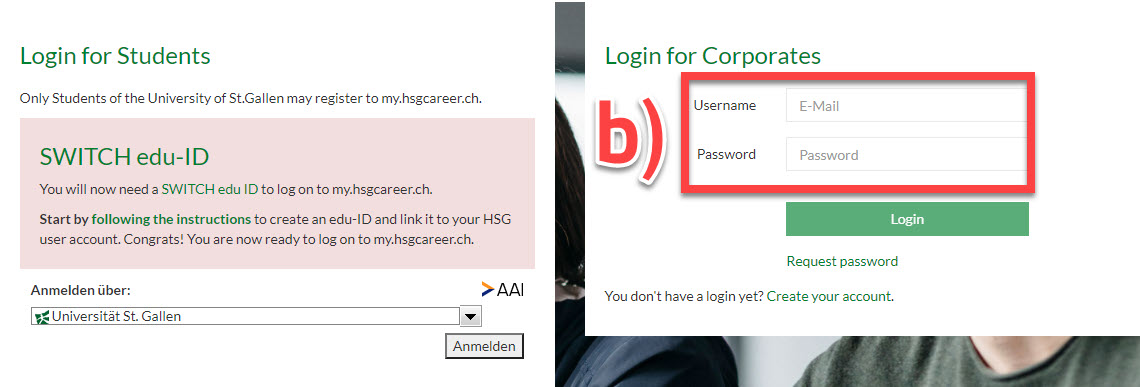
Step 1 – log in on my.hsgcareer.ch
a) Click “Login” on the start page
b) Enter your username and password
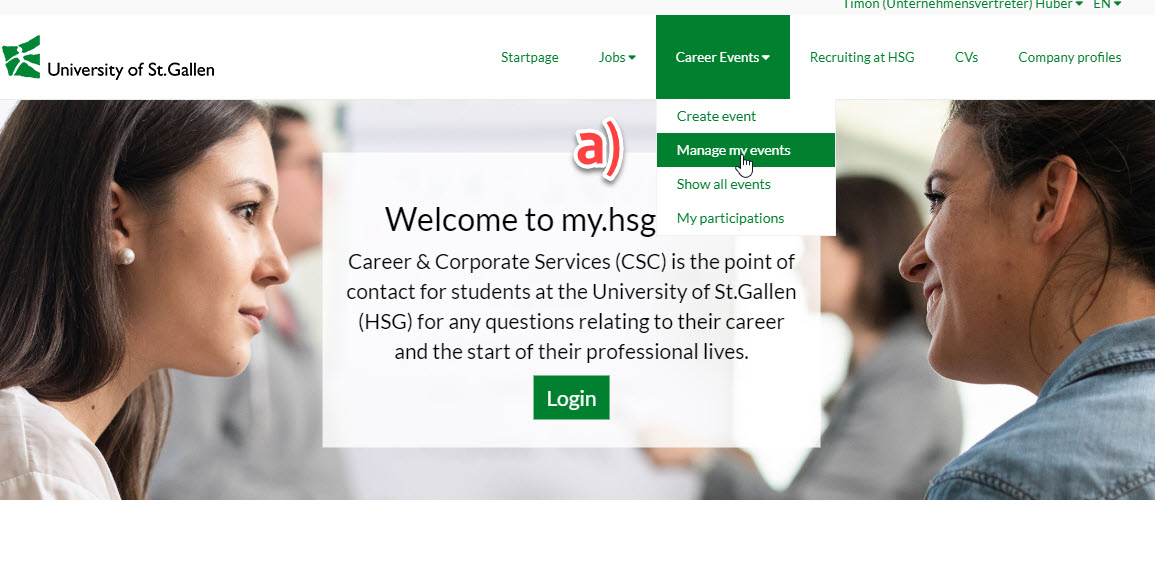
Step 2 – go to the selection page
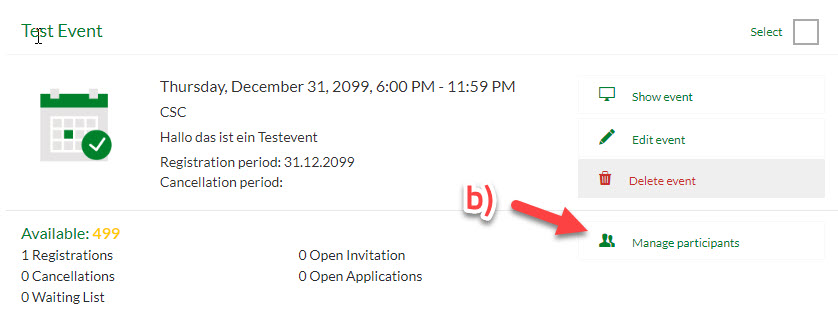
a) Click on «Career Events» and choose «Manage my events»
b) Click on «Manage participants» on your event
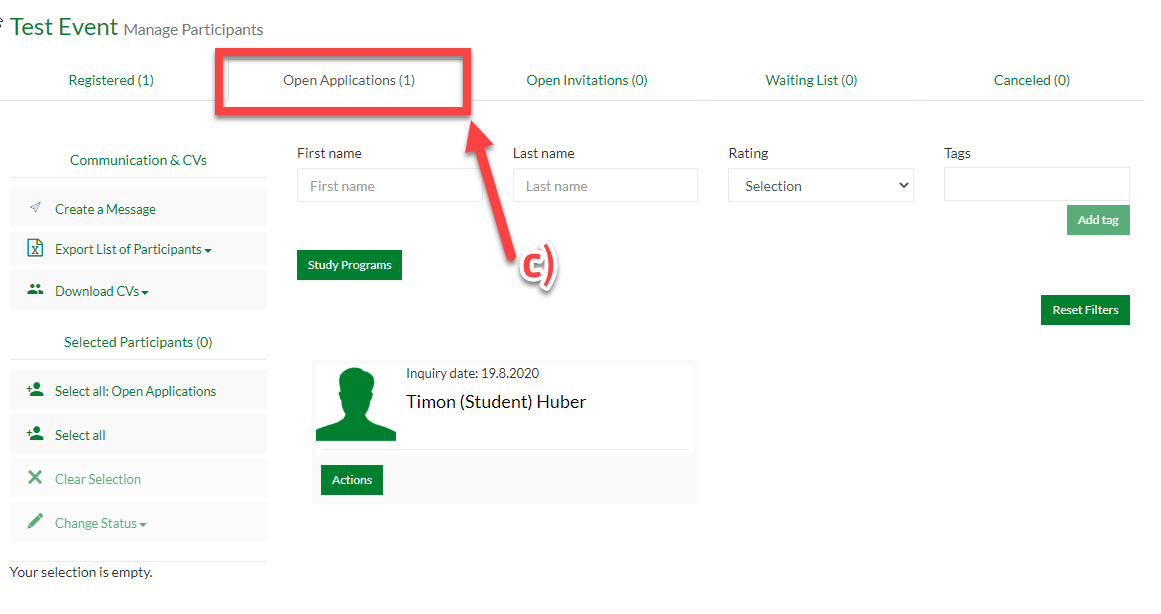
c) Open applications
Under «Open Applications» you see all students who have applied to your event(s). The number indicates how many applications you have received.
c) Open applications
Under «Open Applications» you see all students who have applied to your event. The number in brackets shows you how many applications there are.
Step 3 – screen the CVs
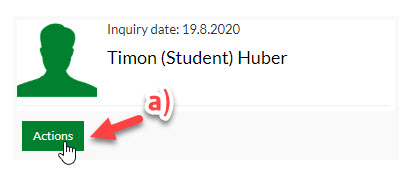
a) To access a CV of a student, click «Actions» just below the profile picture of the candidate.
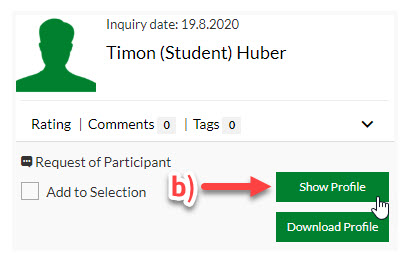
b) You then have the option to see the detailed profile -> Click: «Show Profile»
With just one click you can download all the CVs. How? Click “Download CVs – requests from participants”. Please note that a download of 50 CVs takes +/- 15 minutes. The download runs in the background and you will receive an email as soon as it is completed. You have a choice of various options to export the CVs. Please pick your preferred option (selected participants, registered, request by participant or waiting list).

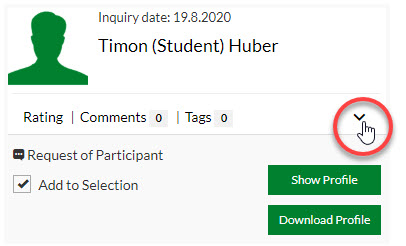
Rating, Comments and Tags
You can group the students with a star (1 to 3) and write comments and tags. All of those options create a structure and help you finding the right students. None of the comments, ratings and tags will be visible for the students.
You can afterwards apply a filter related to your rating.
Step 4 – accept & decline students for your event
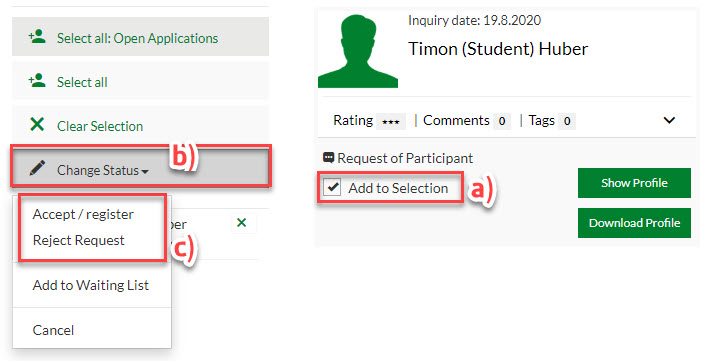
a) Select specific students
b) Change status to one of the following options:
c) “Accept/register” You accept the student to your event!
“Reject request” This candidate doesn’t match your profile and you decline the application.
“Add to waiting list” You are not sure yet if you would like to invite the candidate and will make a decision later.
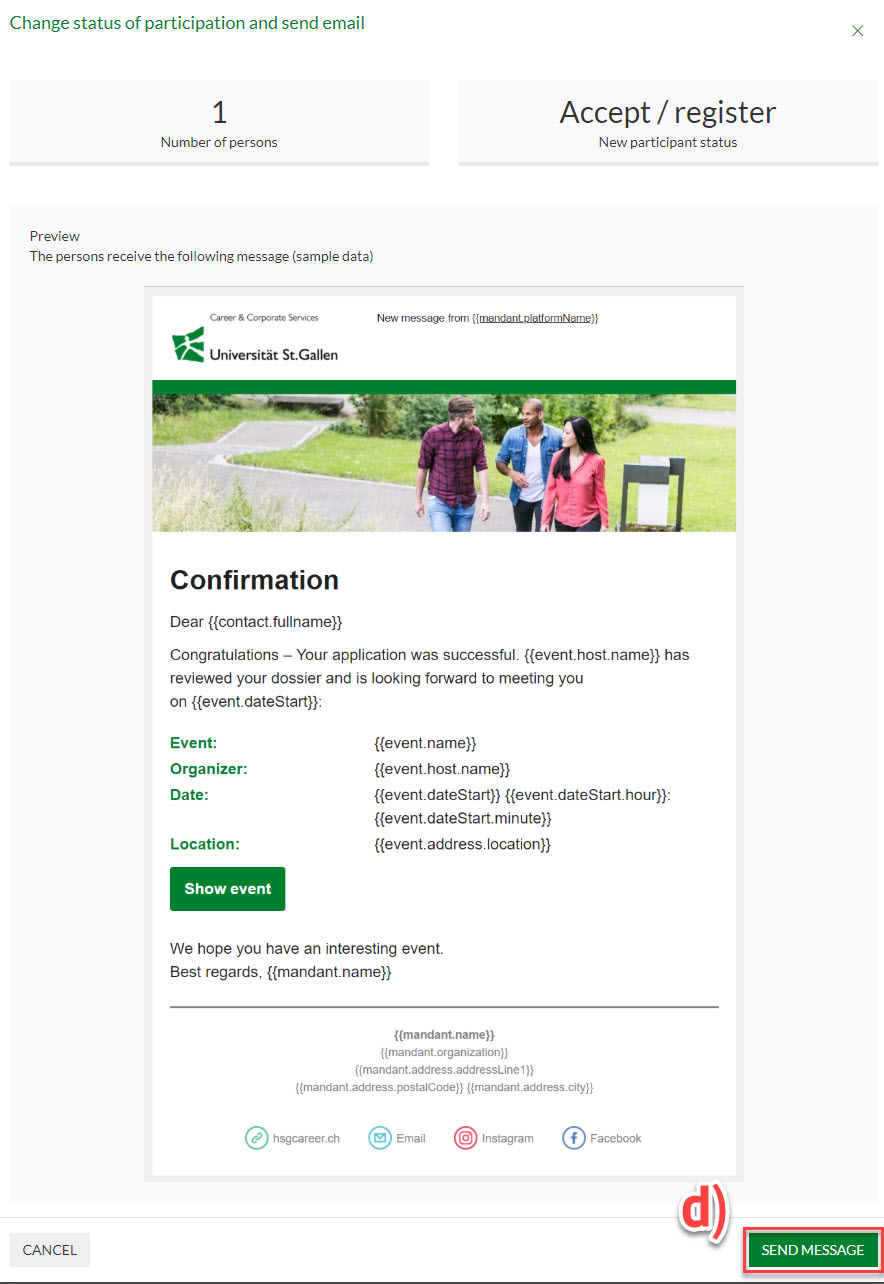
d) Click on "Send Message"
Note: Every time you change a status, an automatic e-mail is sent out to all selected students.
Before you send a message you'll see a preview of the e-mail that will be sent to the participants.
Please make sure you invite / decline all students or add them to the waiting list. In the end, there should be no open applications left.
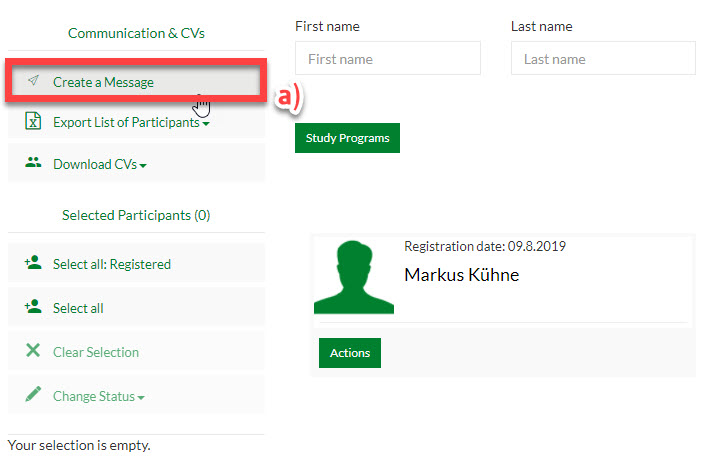
Step 5 – send messages to students
Send messages to students for all the events.
a) "Create a Message"
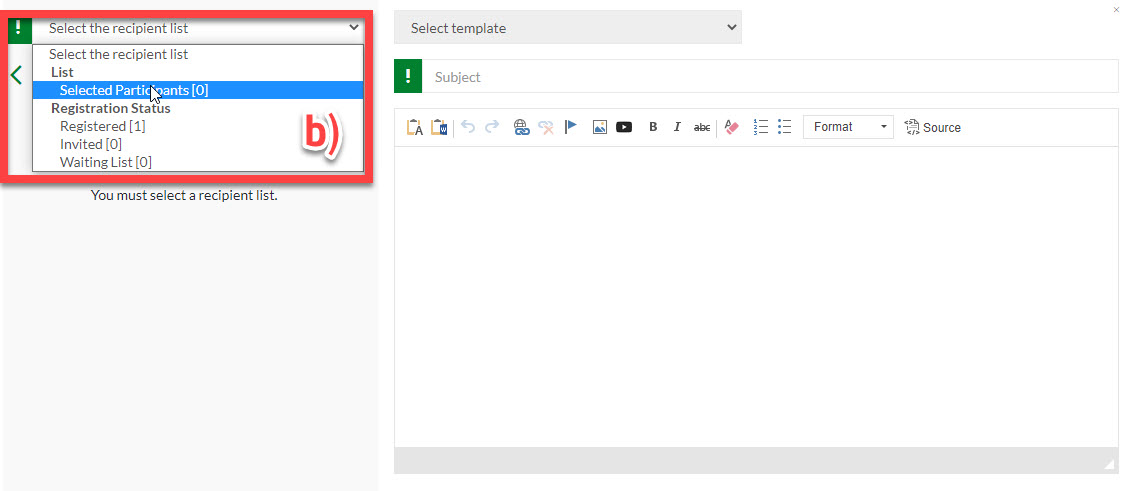
b) Choose the option “Select the recipient list” and click “registered”. Now “send message”. All the registered students will receive this message.
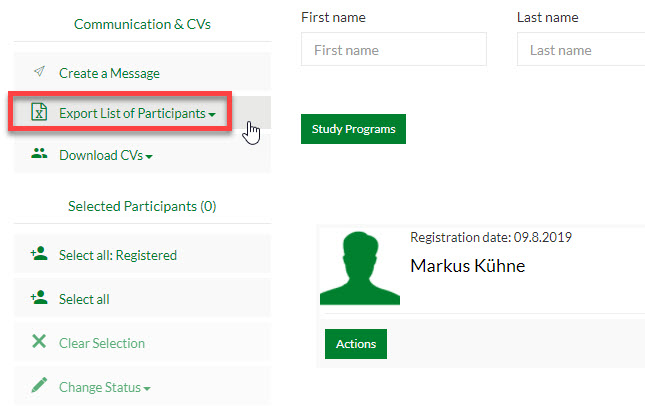
Send messages to students for an interview
a) Click “Export List of Participants”
b) Pick the email addresses from the Excel file
c) Send a personal email to the selected student (including start time and room number)
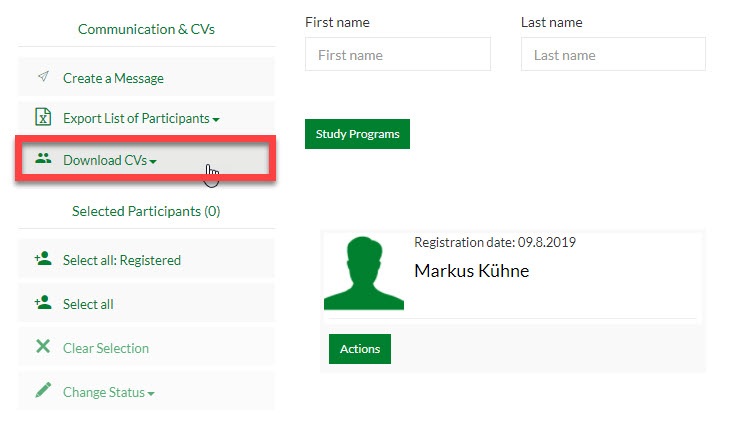
Step 6 – download CVs
You have a choice of various options to export the CVs. Please pick your preferred option (selected participants, registered, request by participant or waiting list).